Live styled preview
The viewfinder is responsive and already carries the Analog response, so the user is not shooting blind.
Current app reconstruction
The app feels like a camera: watch the live Analog preview, take the shot. Under that simple surface, Tensei gathers multiple protected frames, reconstructs scene light, keeps headroom as a debug-visible gain map, and renders the result through its Analog response.
The split background compares the same reconstructed capture before and after the Analog render, so the page opens with the visible effect before explaining the mechanism.
Start with the current app stateWhere the app is now
First principle: a camera app should not ask the user to understand reconstruction. The primary surface is a live Analog viewfinder with zoom, flash, photo/video mode, shutter, and the most recent capture.
The deeper pipeline exists so each capture can be tuned and trusted. The current app can save a normal JPEG while debug bundles preserve the selected frames, alignment, merged HDR reference, LDR image, gain map, preview output, and final render.
The viewfinder is responsive and already carries the Analog response, so the user is not shooting blind.
The same camera surface can take stills or record filtered video; the explanation below focuses on still reconstruction.
The live preview and final capture share one Analog optical, film, and color response.
When tuning is needed, the app can keep enough intermediate evidence to rerender the same moment without recapturing it.
A camera UI screenshot would only show controls and chrome. The useful claim here is product shape: the main surface stays simple while the capture can still leave enough evidence for replay.
Step 1
The shutter uses recent camera frames as source material. Scene assessment decides whether the shot should merge 8, 12, 16, 24, or 32 frames, how aggressively to protect highlights, and what exposure context the renderer needs later.
That matters because Analog depends on light behavior. Clipped highlights cannot produce believable glow or rolloff, and a single display-encoded image cannot tell the renderer where there was real headroom.
The app keeps a rolling buffer of live frames that can be selected when the shutter fires.
Histogram and exposure state estimate highlight pressure, shadow noise, and useful merge depth.
The capture path chooses frames that can actually contribute instead of blindly stacking everything.
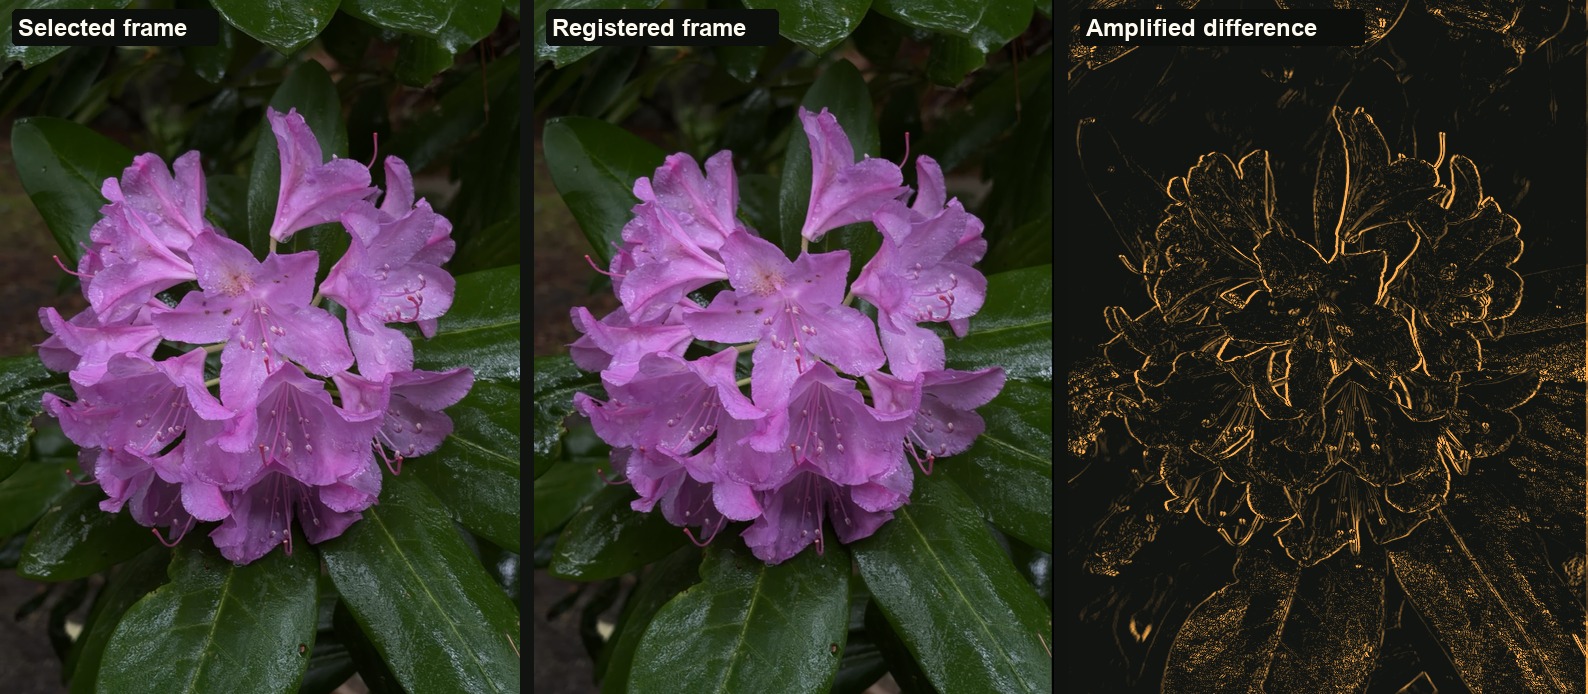
Selected frames are aligned before fusion so handheld capture does not turn detail into blur.
Step 2
The fusion step produces several linked artifacts. The renderers need them because no single display image contains enough information to model highlight rolloff, glow, color response, and texture.
LDR means the normal image a screen or JPEG can show. HDR means the reconstructed scene still has brightness beyond that display range. A gain map is the bridge: a separate image that says where extra brightness was available before tone mapping hid it.
Replay bundle 20260530-163339-318-EC56DB87
This purple rhododendron capture was taken on May 30, 2026. The app had 32 buffered frames available, and scene assessment chose an 8-frame merge for this close flower shot. The raw linear HDR reference is stored as replay/merged_hdr.rgba16f; the current user-facing save is a reliable JPEG, while replay keeps the LDR, gain map, preview output, and final render for inspection.
A file gallery would prove the bundle exists, not that the reader understands it. The diagnostic below asks a simpler question: if this were one frame instead of a summed burst of protected underexposures, which parts would run above range and which parts would fall below useful signal?
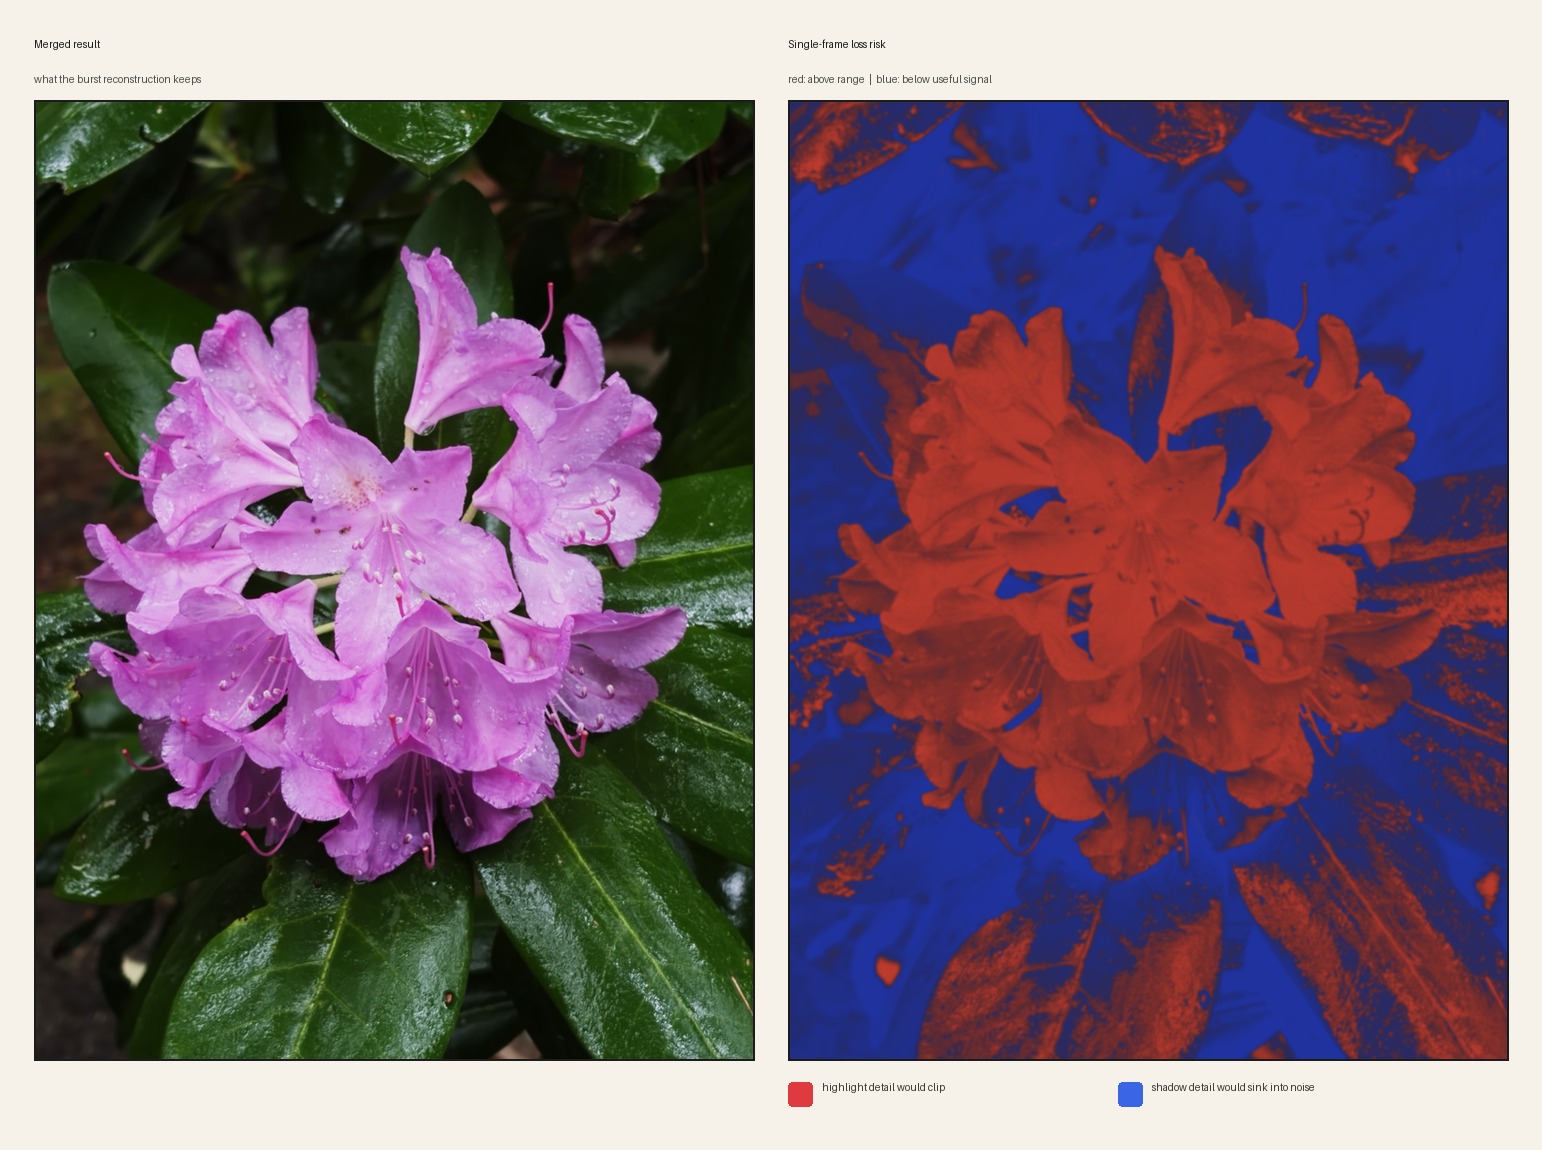
The steps below stay text-only because normalization, weighting, linear-light math, and display conversion are operations on the same data. A still frame from each stage would be an artifact sample; the useful visual claim is already the clipping-risk map above.
Each chosen frame enters the merge path with exposure context. The goal is to compare light, not arbitrary display brightness.
Motion-aware alignment decides which pixels are trustworthy. Strong frames contribute more; unstable regions contribute less.
The fused image represents scene light before styling. In linear light, doubling the stored value means doubling the light, so averaging frames is meaningful instead of being screen-brightness math.
The LDR is the normal visible version of the fused scene. It is not the whole truth; it is the base layer for display.
The HDR reference and gain map record where the LDR had hidden headroom. On this site the map is inverted for readability; darker regions carry more retained reserve.
Step 3
A flat JPEG only says what a pixel became after tone mapping. The gain map says how much brightness reserve was still available in the reconstructed scene. That distinction is why highlight handling can be local instead of a global contrast trick.
Tensei uses that headroom for three visible behaviors: protecting highlights from hard clipping, deciding where glow or halation is eligible, and changing how color and texture react across shadows, midtones, and bright areas.
The print and film shoulder compress bright values while trying to keep white areas from becoming flat blocks.
Headroom gates the warm scatter source so halation follows bright scene energy instead of every pale surface.
Grain is applied in density space so dark areas, midtones, and bright areas do not all receive the same texture.
The clipping-risk map above carries the visual evidence. This section explains what the renderer does with that signal; another still would repeat the same point.
Step 4
Analog targets a new disposable camera: fresh color, plastic-lens softness, visible film texture, and believable highlight behavior. Not an aged, yellow, damaged preset.
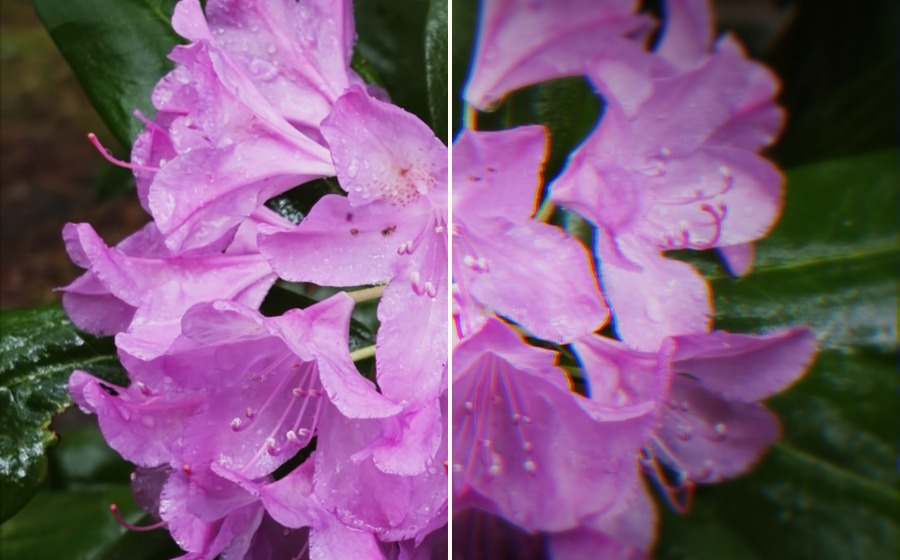
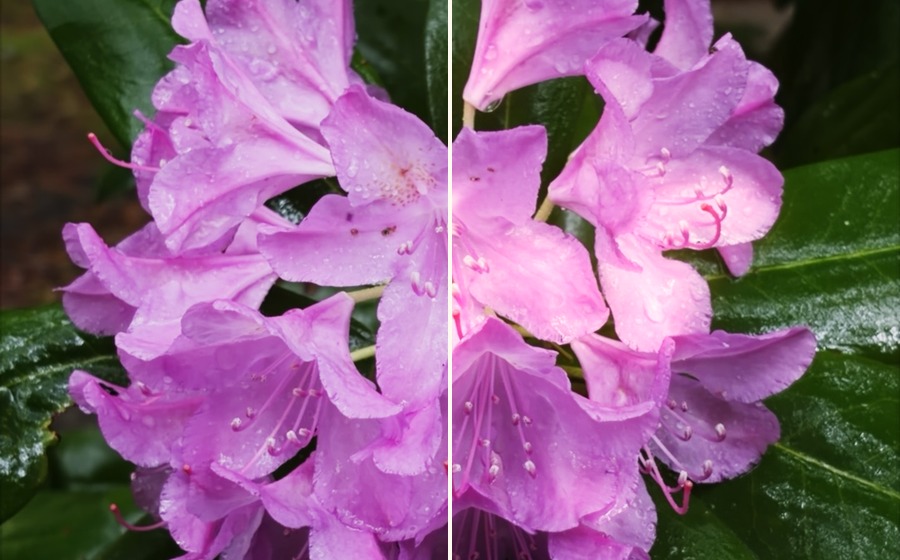
The examples below are split views derived from the same fused flower image. They isolate the kind of change each Analog stage makes; they are teaching examples, not separate replay exports.
Soft edges, mild barrel distortion, vignette, and chromatic aberration make the image feel captured through simple plastic optics.
Bright source energy is scattered before the film response. The kernel redistributes light rather than simply adding glow on top.
Toe, shoulder, gamma, channel sensitivity, dye crossover, and reciprocity response shape color as if light passed through film layers.
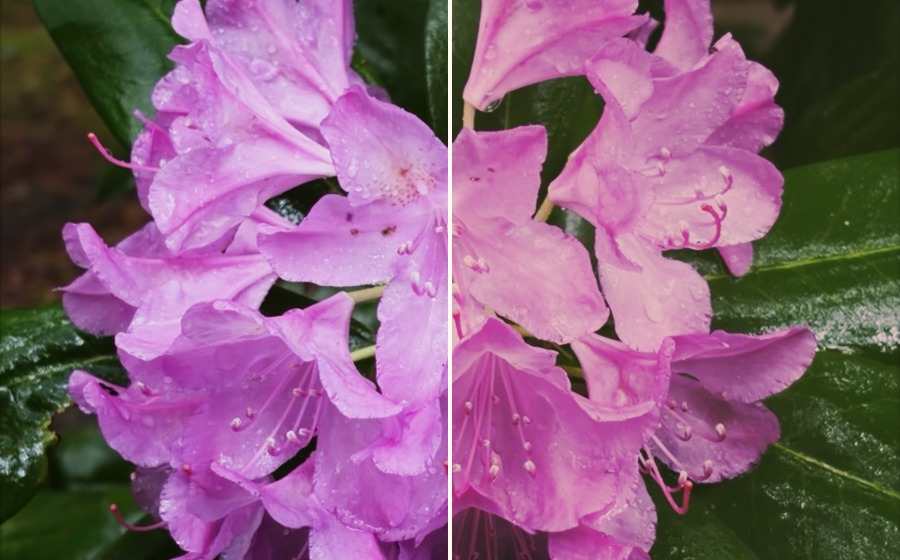
Print density sets black point, paper white, contrast, toe lift, and highlight compression so whites look photographic rather than digital.
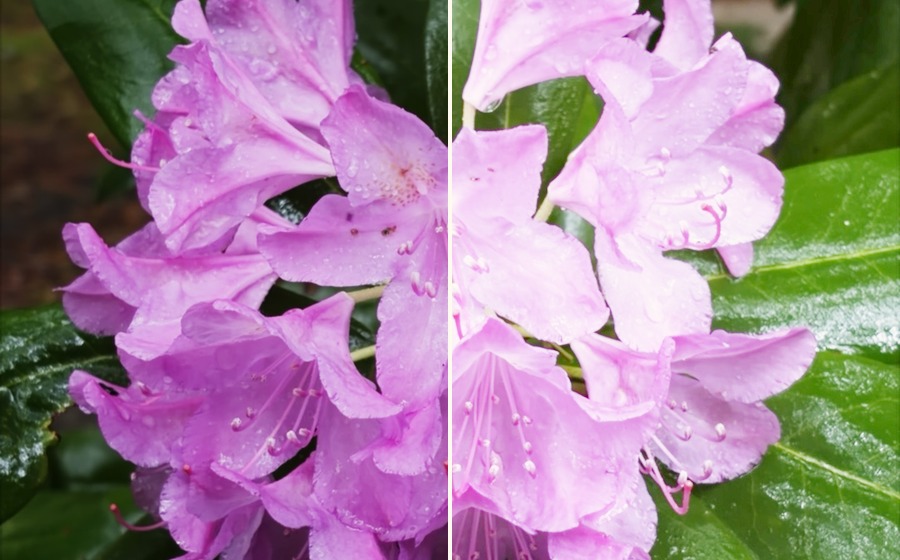
Saturation, warm/cool balance, green response, skin protection, and highlight chroma protection keep the result pleasing without looking like a generic preset.
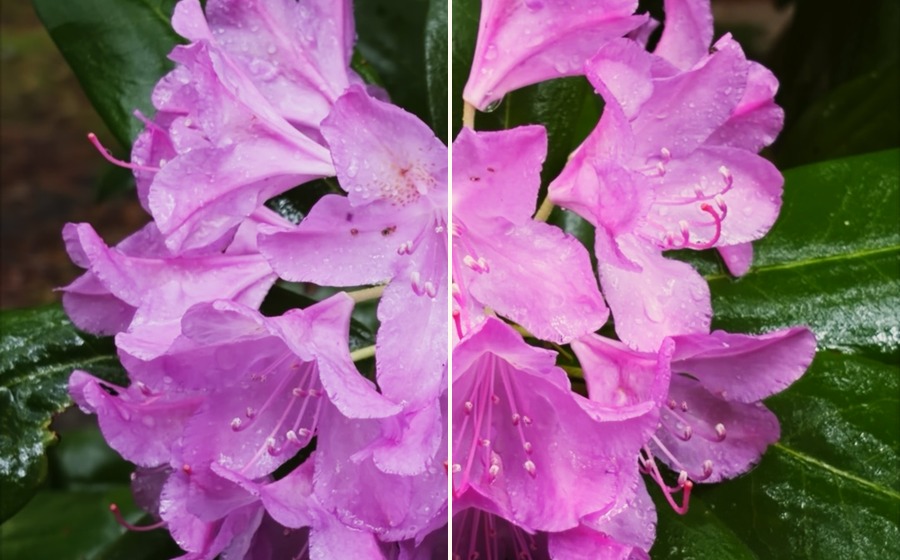
Static blue-noise-driven grain is rotated per shot and weighted by density so it reads as film texture instead of animated digital noise.
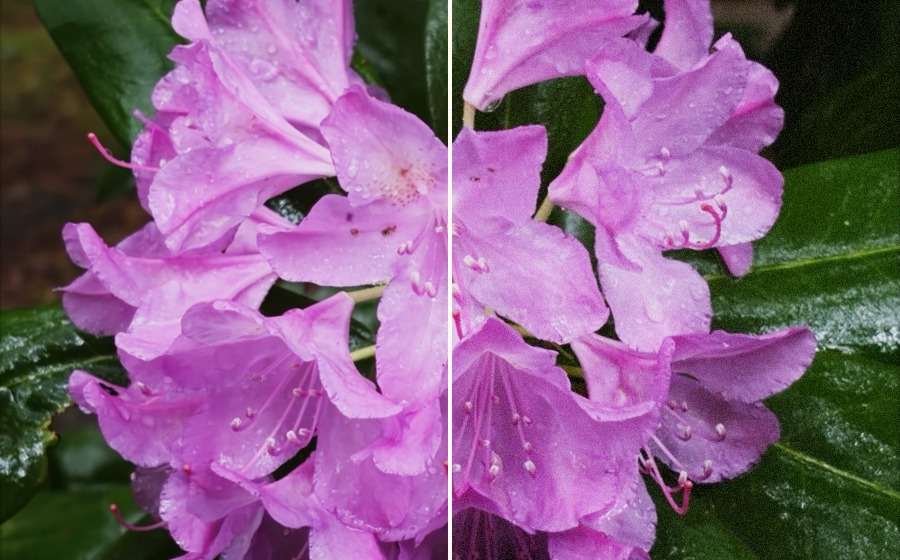
These examples explain the effects in isolation. The actual proof still comes from replay: one source capture can be rendered through the current Analog chain and compared against future versions without reshooting.
Step 5
A saved photo is only the final result. For tuning, Tensei can keep the parts behind it: chosen frames, exposure data, alignment weights, fused LDR image, gain map, HDR reference, preview, and final render.
That makes the look replayable. We can open one capture, compare old and new renders, and look for failures that matter in a photograph: clipped whites, dull shadows, weak glow, fake color, or texture that feels pasted on.
Proof is the relationship between files in the replay bundle: the same source capture can be rendered through different versions of the look pipeline. Repeating the LDR, preview, and final images here would look evidentiary without adding a new visual fact.